
Roof Inspection Checklist 2025: What To Look For And Why
Inspection & Repair
Roof Maintenance
October 18,2025
Roof Inspection Checklist 2025: What To Look For And Why
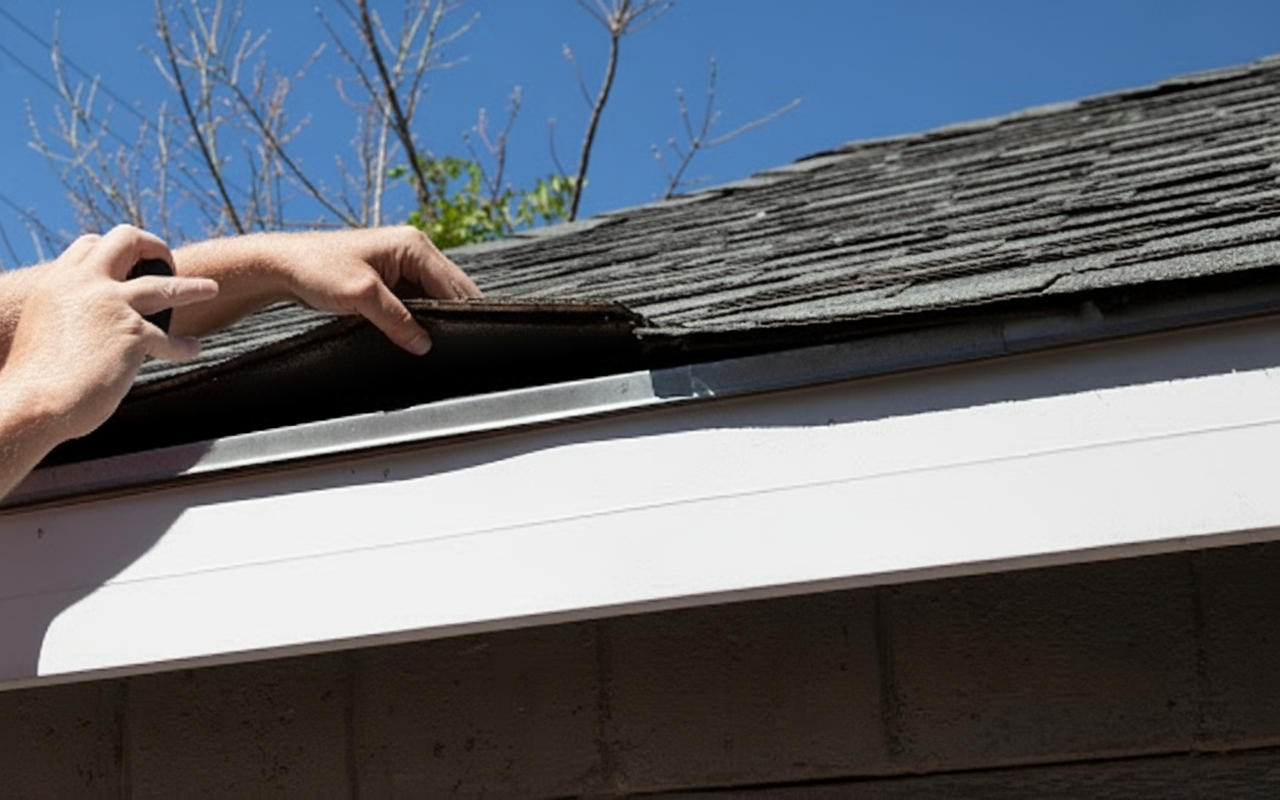
Alt text: Professional roof inspector examining residential roof shingles with safety equipment and inspection checklist
Your roof works hard every day to protect your home from rain, wind, snow, and harsh UV rays. Yet most homeowners rarely think about roof maintenance until a problem appears. Regular roof inspections help you catch small issues before they become expensive repairs or replacements.
A proactive roof inspection twice per year can save you thousands of dollars in emergency repairs and extend your roof’s lifespan by 5 to 10 years.
This guide walks you through a complete roof inspection checklist, explains when to inspect your roof, and shows you what warning signs demand immediate attention. Whether you handle inspections yourself or hire a professional, understanding what to look for keeps your home safe and your investment protected.
Why regular roof inspections protect your home
Roof inspections serve as preventive medicine for your home. Just as regular health checkups catch problems early, systematic roof evaluations identify minor damage before it spreads. A small crack in flashing today can become a major leak tomorrow, potentially causing water damage to insulation, ceilings, and walls.
Consider these key benefits of routine inspections:
Prevent costly emergency repairs. Addressing loose shingles or minor leaks costs far less than replacing water-damaged decking or repairing interior ceiling damage. Early detection means smaller repair bills.
Maintain your home’s structural integrity. Water infiltration weakens roof decking, compromises insulation, and creates conditions for mold growth. Regular inspections help you spot moisture issues before they threaten your home’s structure.
Extend your roof’s service life. Most roofs last 20 to 30 years with proper care. Simple maintenance tasks like clearing debris and replacing damaged shingles add years to your roof’s lifespan.
Preserve insurance coverage. Many homeowners insurance policies require regular maintenance. Documentation of roof inspections for insurance purposes can help support claims and prove you’ve maintained your property.
When to schedule roof inspections
Timing matters when it comes to roof inspections. Schedule comprehensive evaluations at least twice yearly, ideally in spring and fall. These seasons allow you to prepare for extreme weather conditions.
Here’s when you should always inspect your roof:
Spring inspections reveal winter damage from ice, snow, and freeze-thaw cycles. Check for lifted shingles, damaged flashing, and gutter problems before summer storms arrive.
Fall inspections prepare your roof for winter weather. Clear debris from gutters, verify all shingles sit flat and secure, and ensure attic ventilation works properly.
After severe weather events like hailstorms, heavy winds, or hurricanes, examine your roof for damage. Even if you see no obvious problems, hidden damage may exist. Learn to recognize signs you need a roof inspection after storms.
Following nearby roof work can send debris onto your property. If neighbors had roofing done, check for stray nails or material damage.
If you’re uncomfortable working at heights or your roof has a steep pitch, hire a professional inspector. Safety always comes first.
Regular documentation of roof inspections helps maintain warranty coverage and provides valuable records for future home sales.
| Inspection Type | Frequency | Best Time |
|---|---|---|
| Routine maintenance | Twice yearly | Spring and Fall |
| Post-storm check | As needed | Within 48 hours |
| Pre-winter prep | Annually | October-November |
| Insurance documentation | Per policy | Varies by insurer |
Your complete roof inspection checklist
A thorough roof inspection covers exterior surfaces, interior spaces, and structural elements. This systematic approach ensures you don’t miss critical warning signs.
Exterior inspection points
Start your inspection from the ground using binoculars, then move to a ladder for closer examination if you feel comfortable doing so.
Check shingles carefully. Look for missing, cracked, curling, or damaged shingles. Asphalt shingles should lie flat without lifted edges. Missing granules create bare spots that accelerate wear. If you notice extensive shingle damage, review your options for roof patch repairs or full replacement.
Inspect flashing thoroughly. Flashing seals vulnerable areas around chimneys, vents, skylights, and valleys. Bent, rusted, or separated flashing allows water penetration. Check that caulking remains intact and flexible.
Examine gutters and downspouts. Clear all debris that blocks water flow. Gutters should attach securely to your home without sagging. Check that downspouts direct water at least six feet away from your foundation.
Look for organic growth. Algae appears as dark streaks, while moss grows in thick patches. Both trap moisture against your roof and accelerate deterioration. Consider professional roof cleaning if growth covers large areas.
Assess overall condition. Stand back and look at your roof’s profile. Sagging areas indicate structural problems that need immediate professional evaluation.
Interior inspection areas
Head to your attic during daylight hours to check for problems from inside.
Search for water stains. Brown or yellow stains on rafters, insulation, or decking signal active or past leaks. Even old stains deserve attention, as they show vulnerable areas prone to future problems.
Check insulation condition. Wet or compressed insulation loses effectiveness and promotes mold growth. Insulation should appear dry, fluffy, and evenly distributed.
Look for daylight penetration. Small light beams shining through the roof deck indicate holes or gaps where water can enter. Mark these spots for repair.
Inspect ventilation systems. Proper attic ventilation prevents moisture buildup and reduces energy costs. Ensure soffit vents and ridge vents remain clear and functional.

Alt text: Homeowner and contractor discussing roof inspection results and maintenance recommendations outdoors
Critical structural elements
Some problems hide beneath the surface and require trained eyes to identify.
Evaluate roof decking. From inside your attic, look for soft spots, rot, or sagging in the plywood decking. Compromised decking needs immediate replacement to prevent collapse.
Check metal components. Inspect exposed metal elements for rust, corrosion, or deterioration. Metal flashing, vents, and fasteners should remain intact and rust-free.
Assess chimneys and masonry. Crumbling mortar, cracks in chimney caps, or damaged crowns allow water infiltration. These repairs often require specialized skills.
For homes with commercial properties, review essential commercial roof maintenance tips that apply to larger structures.
Taking action after your inspection
Once you complete your inspection, prioritize findings based on urgency. Some issues need immediate attention, while others can wait for scheduled maintenance.
Address emergency issues immediately. Active leaks, large areas of missing shingles, or structural sagging require urgent professional help. Don’t delay on problems that threaten your home’s integrity. Know what to do during emergency roof repairs to minimize damage.
Schedule repairs for moderate concerns. Minor flashing problems, small shingle damage, or gutter issues should be fixed within a few weeks. These prevent bigger problems from developing.
Plan maintenance for minor items. Cleaning gutters, removing debris, or trimming overhanging branches can happen during your next maintenance window.
Document everything. Take photos of damage, note dates, and keep repair records. This documentation helps with insurance claims and proves regular maintenance.
When deciding between repair and replacement, consider your roof’s age and the extent of damage. Learn more about how to evaluate whether to repair or replace your roof based on your specific situation.
Understanding typical roof repair costs helps you budget appropriately and avoid surprise expenses.