
Where to Nail Shingles: Proper Placement Guide for 2025
Installation & Care
Shingle Roofing Selection
October 22,2025
Where to Nail Shingles: Proper Placement Guide for 2025
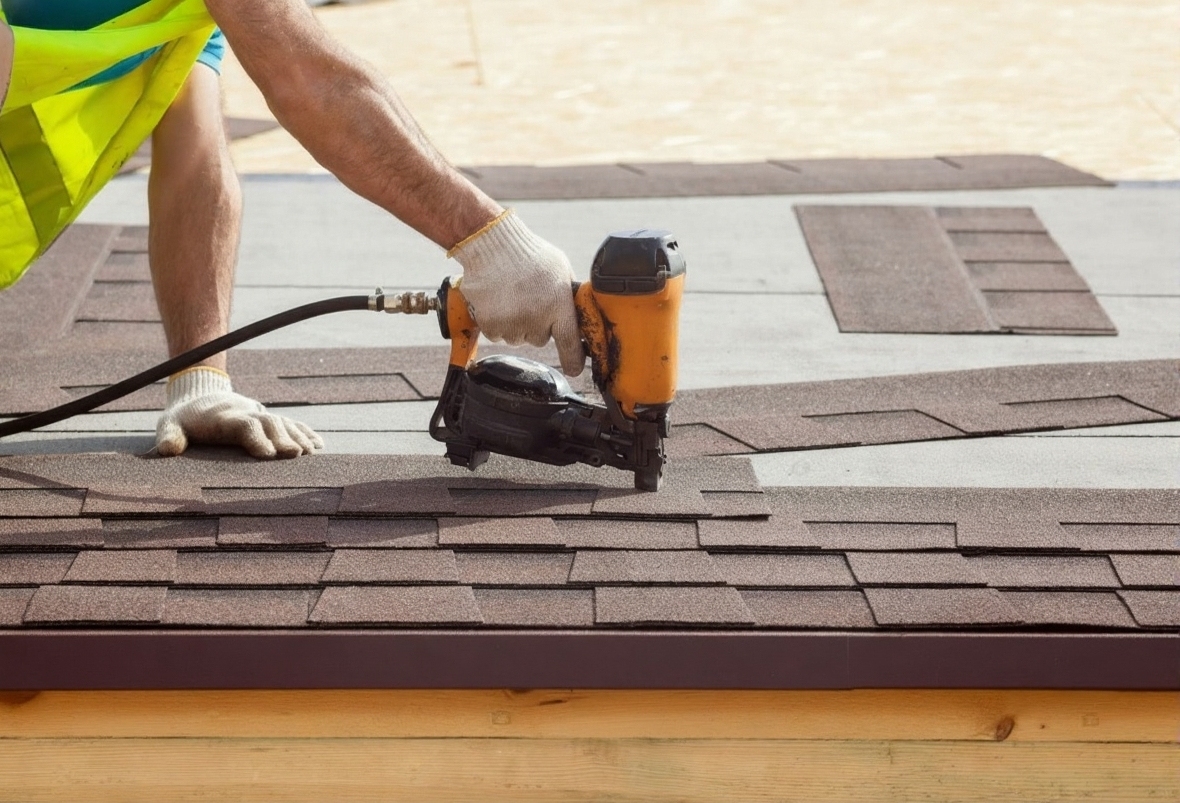
Alt text: Professional roofer demonstrating proper nail placement technique while installing asphalt shingles on a residential roof
Getting nail placement right is one of the most critical factors in roof installation. When shingles are nailed correctly, your roof can withstand heavy rain, strong winds, and years of weather exposure. However, improper nailing leads to blown-off shingles, leaks, and expensive repairs that could have been avoided.
Proper nail placement is the difference between a roof that lasts 20+ years and one that fails after the first major storm.
Whether you are evaluating a contractor’s work or planning a DIY project, understanding where to nail shingles ensures your roof performs as intended. This guide covers everything you need to know about shingle nail placement, including specific techniques for different shingle types and common mistakes to avoid.
Why nail placement matters for roof durability
The way shingles are nailed directly impacts how well your roof holds up over time. Each nail creates a secure attachment point between the shingle and the roof deck. When nails are placed correctly, they distribute stress evenly across the shingle surface and prevent lifting during high winds.
Incorrect nail placement creates weak points in your roof system. Nails driven too high might miss the underlying shingle, reducing the effective hold. Nails placed too low can be exposed to weather, leading to rust and leaks. The pressure used when driving nails also matters since overdriven nails tear through the shingle material while underdriven nails leave the shingle loose.
Proper nailing technique involves understanding your shingle type, following manufacturer specifications, and adapting to local climate conditions.
Proper nailing technique involves understanding your shingle type, following manufacturer specifications, and adapting to local climate conditions. For instance, homes in hurricane-prone areas require additional nails per shingle compared to standard installations. Learning these nuances helps you maintain a weather-resistant roof that protects your home and lasts for decades. If you are working with architectural shingles, the installation process requires extra attention to layering and nail placement.
Correct nail placement for different shingle types
Each shingle type has specific requirements for nail placement. Following these guidelines ensures maximum hold and prevents damage during installation.
| Shingle Type | Nail Placement | Number of Nails | Distance from Edge |
|---|---|---|---|
| Asphalt Shingles | Just below adhesive strip | 4 (standard) / 6 (high-wind) | 5/8 to 1 inch from top |
| Architectural Shingles | Above cutouts | 6 nails per shingle | 5/8 inch from top, 1 inch above cutouts |
| Wood Shingles | Above exposure line | 2 nails per shingle | 3/4 inch from each edge |
| Three-Tab Shingles | Just above cutouts | 4 nails per shingle | 5/8 inch from edges |
Asphalt shingles
Asphalt shingles are the most common roofing material in residential construction. Place nails just below the adhesive strip, typically 5/8 to 1 inch from the top edge of the shingle. Most manufacturers print a nail line on the shingle to guide placement. Use four nails per shingle in standard conditions, spacing them evenly across the width. For high-wind areas, increase to six nails per shingle for added security. When you measure your roof for shingles, factor in the additional materials needed for proper nailing patterns.
Architectural shingles
Architectural shingles are thicker than standard three-tab shingles and require precise nailing. Position nails about 1 inch above the shingle cutouts and 5/8 inch from the top edge. The standard pattern uses six nails per shingle to account for the additional weight and layered construction. Ensure nails penetrate through both the architectural shingle and the underlying shingle for a secure hold. Understanding what shingles are made of helps you appreciate why proper nail depth matters for these heavier materials.
Wood shingles
Wood shingles demand careful handling to prevent splitting. Place nails about 3/4 inch from each edge and 1 to 2 inches above the exposure line. Use two nails per shingle, driving them straight and flush without excessive force. Pre-drilling pilot holes can help prevent cracks in brittle wood. Choose corrosion-resistant nails since wood shingles are more susceptible to moisture damage.
Three-tab shingles
Three-tab shingles have a simple, uniform design. Position nails just above the cutouts between tabs, typically 5/8 inch from the edges. Use four nails per shingle, ensuring each nail secures the top edge of the shingle below. This creates a double-layer hold that resists wind uplift. If you are comparing three-tab vs architectural shingles, note that three-tab shingles generally require fewer nails due to their lighter weight.
Essential techniques for proper shingle nailing
Mastering the technical aspects of nailing ensures your roof installation meets professional standards. Here are the key techniques you need to follow.
Choose galvanized roofing nails that resist rust and corrosion. The nail length should allow at least 3/4 inch of penetration into the roof deck. Standard roofing nails are 1 to 1.25 inches long for most applications. In areas with thick sheathing or additional layers, longer nails may be necessary. The nail head should be large enough (typically 3/8 inch diameter) to hold the shingle securely without tearing through the material.
If you use a pneumatic nail gun, adjust the pressure so nails sit flush with the shingle surface. Overdriven nails create dimples and weaken the shingle. Underdriven nails stick up and can puncture the shingle above or catch wind. Test your nail gun on scrap shingles before starting the actual installation. Check the pressure throughout the day since temperature changes can affect air pressure in the compressor.

Alt text: Experienced roofing contractor carefully nailing architectural shingles following manufacturer guidelines
Every shingle brand provides installation instructions that include nail placement diagrams. These specifications are designed for optimal performance and are often required to maintain warranty coverage. Pay attention to details like the number of nails per shingle, placement relative to adhesive strips, and any special requirements for ridge cap shingles. Deviating from these instructions can void your warranty and compromise roof integrity.
Your local weather conditions should influence your nailing pattern. High-wind zones require six nails per shingle instead of the standard four. Coastal areas benefit from stainless steel nails that better resist salt air corrosion. Cold climates may require hand nailing in winter since pneumatic nail guns can be less reliable in freezing temperatures. If you live in Florida or another hurricane-prone area, consider hurricane-rated shingles that are designed to withstand extreme conditions with proper nailing techniques.
Space nails evenly across each shingle to distribute stress uniformly. Irregular spacing creates weak points where shingles are more likely to lift or tear. Use a chalk line or marks on your nail gun to maintain consistent placement from one shingle to the next. This consistency becomes especially important when working with dimensional shingles that have varied surface textures.
Common mistakes to avoid when nailing shingles
Even experienced installers can make nailing mistakes that compromise roof performance. Being aware of these common errors helps you avoid costly problems down the road.
One frequent mistake is placing nails too high on the shingle. High nailing fails to penetrate the underlying shingle layer, reducing wind resistance significantly. Another error is overdriving nails, which tears the shingle material and creates entry points for water. Conversely, underdriven nails leave shingles loose and vulnerable to wind uplift. Using the wrong nail type or length also causes problems, as does inconsistent spacing that creates weak spots across the roof surface.
FAQ
How many nails should I use per shingle?
Standard installations require four nails per shingle for most asphalt and three-tab shingles. However, architectural shingles typically need six nails due to their increased weight and thickness. High-wind areas and steep slopes also require six nails per shingle regardless of shingle type. Always check your shingle manufacturer’s specifications since requirements can vary by product line and local building codes.
Where exactly should nails be placed on asphalt shingles?
Place nails 5/8 to 1 inch below the adhesive strip on asphalt shingles. Most manufacturers print a nail line on the shingle surface to guide proper placement. Nails should be positioned so they penetrate through the current shingle and the top edge of the shingle below it. Space nails evenly across the width of the shingle, typically 1 inch from the edges and evenly distributed across the center.
What happens if shingles are nailed incorrectly?
Incorrectly nailed shingles lead to multiple problems including wind blow-offs, water leaks, premature shingle failure, and voided manufacturer warranties. High-nailed shingles fail to secure the underlying layer properly, making them vulnerable to wind uplift. Overdriven nails create weak points where shingles tear and allow water infiltration. These issues often require partial or complete roof replacement, making proper nailing technique critical for long-term roof performance.
